Training in Virtual Reality

In the past weeks, we looked at the possibilities of using VR (Virtual Reality) as a means for eLearning and training. Today I would like to share an excellent example of this use in practice.

Sentient Computing has published a video about using the HTC Vive for training of high voltage switching. The video can be seen here:

https://www.youtube.com/watch?v=3Ni5L6R6uq8

This training exercise simulates the process of high voltage switching in the safety of virtual reality, before performing the operation on live systems. An experienced high voltage engineer talks a developer through the process of performing the switch using VR goggles and controllers. Thanks to simulations like these, inexperienced persons can become familiar with dangerous procedures without being put in harms way.

MANY APPLICATIONS

There are many applications and situations which may benefit from training in virtual reality. Scuba diving, rock climbing or other high-risk activities, handling dangerous equipment or materials, and other situations that require the learner to familiarize themselves with a process can be trained in VR. It is understood that virtual reality will not replace the real experience, but it can serve as a useful preparation for the actual event.

NEW FRONTIER

Virtual Reality is the new frontier for training and eLearning, and it gives me satisfaction that it’s being utilized for constructive, useful purposes and not just gaming and entertainment. Our company, as well, is preparing to create some VR demos for training and eLearning, and I will be happy to share them with you when they are ready.

If you are interested in learning more about our company, Pathways Training and eLearning, please visit us at our website: http://www.pathwaystrainingandelearning.ca/

Training in Virtual Reality

Developing eLearning for VR: Unreal or Unity?

So you want to develop eLearning applications for VR? Which 3D game engine should you choose, Unreal Engine or Unity?

There are certainly other options, such as CryEngine, CopperCube and Torque3D, but Unreal and Unity are undeniably the mammoths. Both of them provide full VR support for both HTC Vive and Oculus Rift, and both have a long list of blockbuster games that were coded in them. Let’s examine the pros and cons of each.

unity-logo.jpg

Unity

Unity is supported by the official Oculus Rift SDK. Unity Free lets you develop for Oculus Rift without any cost, except the hardware. It provides a number of programming languages to choose from, such as C#, JavaScript and Boo (a form of Python). C# is arguably the most powerful, while JavaScript has the widest selection of tutorials.

Another pro for Unity is the Asset Store. You can find a wide variety of free and paid assets that can easily be added to a game. The assets include music, art, code and modules, to name a few. The powerful asset management system and attribute inspection even allows you to include unique lighting or GUI in your game.

unity_asset_store.jpg

Unity also has a great editor, which is powerful and intuitive. You can pause the gameplay and manipulate the scene at any time, or progress gameplay frame by frame.

Unity-Game-Engine-650x394.jpg

Rapid prototyping is another strong point of Unity. The modular system allows for quick development of an idea. Features such as drag-and-drop editing, shaders, and animation allow you to dive right into developing a game.

Unity_screen_02.png

Unity is a proven game engine with a history of huge developers, such as Microsoft, Paradox, Square Enix and Sega. These developers chose Unity for a reason, and that reason is flexibility and power. With direct access to the code “under the hood”, Unity can be used to create the functionality and game behaviour exactly the way you want it.

There are a few negative aspects to using Unity, which should be mentioned. For example, Unity 4 is built on Mono and C#, which means the garbage collector can impact performance and cause stuttering. C# and .Net usage in Unity is questionable, and a lot of the API uses public static methods. This encourages the use of public fields for everything, and a lot of questionable implicit casting. These are poor coding practices which can lead to problems with inexperienced programmers.

Lastly, Unity3D is a proprietary, closed source game engine. Unity requires a fee for features like basic version control support. If the performance doesn’t satisfy the growing requirements of a project, it will be impossible to migrate a game from Unity due to vendor lock.

Unreal-engine-4-logo.jpg

Unreal

Unreal Engine 4 uses dynamic global illumination with voxel cone tracing. This is a similar algorithm to ray tracing, but uses thick rays instead of pixel thin rays, for a vast decrease in the amount of computational power.

Unreal_dynamic_GI.jpg

UE4 is licensed to developers for a 5% royalty fee on resulting revenue, and includes full access to source code – something not available with Unity.

Among of the greatest benefits of Unreal is Blueprint, a visual scripting system for non-coders. Blueprint resembles flowcharts, with each node representing a function or value. You can easily connect outputs and inputs of nodes, allowing you to tweak and prototype without ever writing any code. Blueprint also allows a better at-a-glance overview of game logic, and makes complex behaviours easier to accomplish.

Unity Blueprint.png

Recompiling an entire game can take a long time. Unreal Engine 4 quickly compiles in seconds instead of minutes, improving the iteration time by an order of magnitude. This makes it great for when you are making small changes and adjustments to your game, which happens very often.

The downside of Unreal is that it’s not completely free. It operates on a royalty based system, whereby 5% of profits will go to Unreal. There are always two sides to every coin.

Two Sides to Every Coin

Whether you develop eLearning applications or games for entertainment, both Unity and Unreal are more than capable of accomplishing the task. You must carefully examine the pros and cons, and decide for yourself which engine is the best one to use. I hope that this breakdown will help you make an educated decision.

To learn more about our company and how we contribute in the field of eLearning, please visit our website at www.pathwaystrainingandelearning.ca

Developing eLearning for VR: Unreal or Unity?

What Makes a Great Educational Game?

Educational games have suffered a bad reputation of being boring and lackluster for decades. Often, such games were created on a low budget with the sole intention to fulfill a requirement, and not necessarily to make the game engaging and fun. Perhaps the people who made such games were unimaginative, perhaps they didn’t care or have the resources to make a truly great game. However, if educational games are to be on par with the great games in the industry, they must follow the same rules and they must excel at them.

As someone who is involved in the eLearning industry and specifically in making educational games, I put a great deal of thought and research into what would make a great educational game. I’ve been a gamer since childhood, and even a game addict. I feel like I wasted countless hours on games which brought me little more than temporary enjoyment and escape from the real world. However, I always felt that the addictive quality of games can be used constructively to teach useful material, if done in a clever and creative way.

I made a list of elements which I feel are important to making a truly great game, and which I would like to share with you:

  1. Story (Linear or non-linear, a great story drives a game)
  2. Progression / Advancement (Customization, saving progress, sense of achievement)
  3. Multiple intelligences (Activities catering to different types of intelligences)
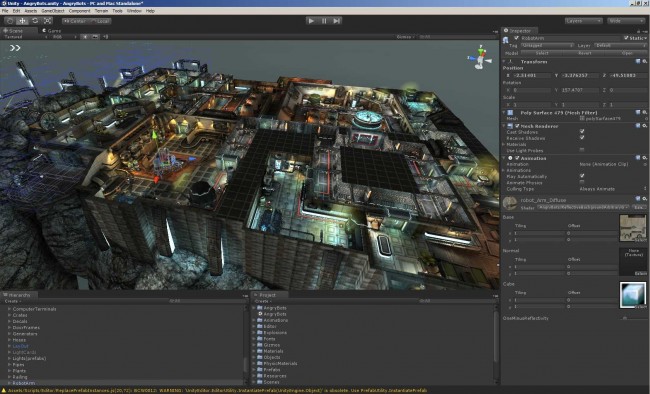
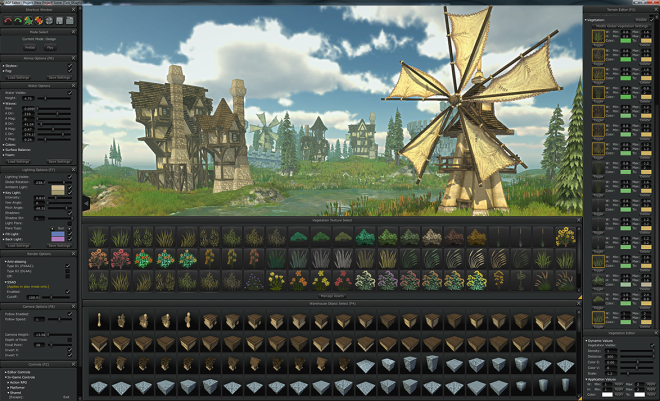
  4. Presentation / Polish (Art style, graphics & animation, sound & music)
  5. Game Balance (Difficulty, need to win/achieve)
  6. Cohesion (It has to make sense)
  7. Uniqueness
  8. Immersion, memorable game world/universe
  9. Replayability

1.    Story

A good story engages the player, establishes goals and obstacles, and binds everything together in a cohesive way that makes sense. People like it when things make sense.

The story gives us an opportunity to create interesting characters, scenes and situations, to personalize the game experience and to make it truly memorable. Certainly, there are successful games which don’t focus on a story, but having a great story certainly adds a whole new dimension to your game.

2.    Progression

People love the feeling of accomplishment. Being able to create a character, customize it, advance through the game and save progress makes players want to come back and continue to build their character. Players love to share and show off their character to their friends, and MMORPGs allow them to socialize, play together with friends, show off their gear/character/achievements and team up to overcome obstacles together.

Players love to customize, even if the customization comes at a cost and doesn’t have any effect on game play. Players spend real money on clothing for their characters, or stickers/insignias on their tanks in games like World of Tanks, where the only effect of the insignia is that other players will see it, and it doesn’t benefit your game play in any other way.

Give players the ability to customize, to advance and level up in various ways, to make choices about how they will progress, and they will love your game!

3.    Multiple intelligences

I played an educational game designed to improve my typing skills when I was in high school. The game consisted of letters falling down from the top of the screen, and I had to type them before they reached the bottom. Very soon, I got bored of the game.

A game that caters to multiple intelligences (see my previous article about eLearning and the Theory of Multiple Intelligences) will be able to engage players more effectively than a game that doesn’t. There are exceptions, of course. Tetris is a game with a very narrow focus, yet it was tremendously successful. However, generally speaking, give the player more to do, more options, more opportunities, more variety – and the player will be interested much longer. Create a world, not a game.

Great games like World of Warcraft, Eve Online, Guild Wars and many others offer activities that allow the player to engage many intelligences. Bodily-kinesthetic for heart-pounding combat that requires good timing and eye-to-hand coordination, logical-mathematical for making the best choices in how to advance the character, optimize resource acquisition, manage skills and inventory. Spatial for navigation in the fascinating environments of 3D games, interpersonal to coordinate efforts in a team or a clan, where players have to work together to overcome obstacles. Address as many intelligences as possible, and build an immersive game that sucks people in and doesn’t let them go. And hopefully, teach them something useful while you’re at it!

4.    Presentation

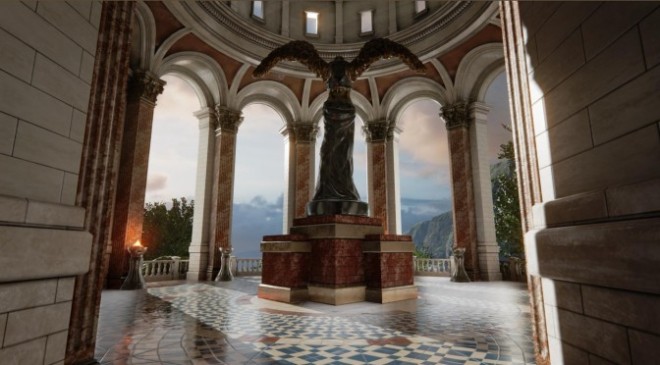
A great story is a good start, but it must be presented in a compelling way. Presentation is a wide spectrum term that covers everything from how the story is told, how the game is shown, how it is supported by sound and music, and the overall polish and finished look of the game.

Imagine you’re going to a job interview. The way you present yourself depends not only on your education and experience, but also on how you dress, how you speak, your manners and etiquette. The same is true for a game – a unique and beautiful art style and compelling sound track can greatly enhance the experience. Animations and special effects can turn your game into a visual feast. However, don’t rely on visual effects to make up for a weak story. The story should always be the foundation.

5.    Game Balance

Game balance is a measure of the overall difficulty of the game, the learning curve required of new users, and the ratio of effort to reward. To make the experience enjoyable, there must be a good balance between difficulty and reward. The game cannot be too complex to learn, or it will deter new users. The game cannot be too simple, or users will lose interest quickly. The game must continually reward the player to keep them coming back, but it must also be challenging enough, or they will lose interest. Matters of game balance must be resolved in the Alpha phase and fine-tuned during the Beta phase, as well as throughout the game development. Often, games will be patched and updated even after the release, not only to address bugs but also to balance the gameplay.

6.    Cohesion

People like it when things make sense. Granted, we also like bizarre comedy and unexpected turns of events, and strange oddities that defy explanation. However, there should be a clear set of rules and order in a game, unless you are specifically trying to create a bizarre and senseless game. If you are making such an illogical game, then at least make sure it is funny. Otherwise, it will be plain frustrating.

A game should make it clear and easy to see how you accrue points or coins, how you advance, and what effects various skills or upgrades have. Beyond that, the story and plot of the game should make sense. If you are designing levels or characters, think about the environment and how those characters would live in it. Design worlds, not rooms. Think about ecosystems. Would those goblins really live right next to those dwarves? It’s alright to take some freedoms, but be careful not to break the believability of the game.

Cohesion has to do with how things sit together – from game mechanics and rules, to storyline and plots, to how the characters and creatures appear, act and live. When a game is cohesive, it opens the doors to create a truly immersive experience, and enable the player to feel like they are really a part of this story or fantasy world. This goes for all sorts of games, even a car racing game is set in a “fantasy world” which bears likeness to our own.

7.    Uniqueness

Although your game might not be truly one of a kind, for goodness sake, don’t just make a clone of one of the popular games out there! Even if your game plays similar to Bejeweled® or Angry Birds®, find ways to give it character. A unique story or art style, interesting characters with unique skills, or game features not found in the original title can give your game a life of its own.

8.    Immersion

If your game has a great story, art style and cohesion, you are well on your way to creating a truly immersive experience. What you need to do is engage the senses. Music and sound add a whole new dimension to the playing experience. The game world has to be able to support great character advancement, with non-linear choices such as skill trees, tech trees, exploration options and character path customization. Aim for non-linear storylines (please read my article on this topic, which I will publish in the next few weeks), allowing the player great amount of freedom of where to go and what to do. Certainly, even playing a story-defined character on a linear storyline can be immersive, but to me it feels no different than reading a book or watching a movie. With this amazing technology at our disposal, we ought to give the player the power to choose, explore, interact and take control of their own fate! It will keep them coming back for more.

9.    Replayability

To make a game replayable, it must provide a different experience each time. There are many interesting games out there with a linear storyline, but I feel that after playing them once or twice, there’s little value in playing them again.

The secret to replayability is either a non-linear storyline, or variability of content. Even games without a storyline can have great replayability values. For example, games of chess or Tetris® are extremely replayable, because they present the player with different situations each time. In Tetris®, the pieces that appear are randomized. In chess, there are millions of possible positions, presenting new obstacles and challenges each time. This variation and randomness makes players keep coming back to try again.

In games that have role-playing elements, giving the player options adds replayability. Non-linear storyline, freedom to explore the game world, making choices in which skills to advance or which equipment to buy, all of these elements add replayability to the game.

In Summary

There is no sure-fire formula for making a successful game. It is, perhaps, even more difficult to make a successful educational game. I believe that an educational game should follow the same principles and contain the same elements that one would expect from any successful game in the entertainment industry. A great story, capacity for in-game progression, addressing multiple intelligences, style and presentation, good game balance, cohesion, uniqueness, an immersive game experience and replayability value are game elements which definitely factor to a great degree. Address these issues, and you will be well on your way in creating a successful educational game.


If you would like to explore more about gamification and eLearning, take a peek at our company website: Pathways Training and eLearning, at http://www.pathwaystrainingandelearning.ca/ .  We always look for fresh ways to engage the learner and to make the experience as fun as possible!

What Makes a Great Educational Game?

Creating Accessible eLearning Modules

When creating eLearning modules, we naturally want to make them as interactive as possible. However, we must be mindful of the special needs of some users who are unable to experience the module in the same way as most of us. How do we make the experience of eLearning fair and accessible to all, and at the same time keep it fun and interactive?

Behindert-Symbol

Closed Captioning

Viewers with hearing disabilities should not be kept guessing what the audio track is saying. Closed captions should be available and easily toggled on/off depending on viewer preference. This function will be appreciated not only by the hearing impaired, but also by people whose first language is other than English, people taking the module in a noisy environment or unable to use the speakers or headphones. Often, even viewers who have sound will prefer to keep the closed captions turned on.

There are several good ways to create closed captions in Storyline, and I will delve deeper into this issue in a future article. However, if you would like to see some tutorials on different ways to tackle this issue, the following link provides a variety of solutions:

http://www.articulate.com/support/storyline/how-to-create-closed-captioning-in-storyline

Keep closed captions in mind when you are designing the template of your module, and reserve a strip of space at the bottom of the screen for the closed captioning text. If you don’t, you may find that the closed captions overlap important elements of your page, such as text or buttons near the bottom of the page.

Closed captions should include any text spoken by the narrator which is not already present on the screen. Use simple, easy to read font such as Arial, preferably in white on a strip of black background.

Tabbed Interface

Not all users will be able to navigate the screen using a mouse, and not all users will be able to read the screen. To facilitate users with these needs, there are various screen reading programs that will read the screen either as text-to-speech or using a Refreshable Braille display. One of the most popular of these readers is JAWS (Job Access With Speech). You can read the details of this software on the following Wiki page:

http://en.wikipedia.org/wiki/JAWS_%28screen_reader%29

To make your Storyline module compliant with JAWS, you have to ensure that your interface and navigation are tabbed. This means that the viewer can use the [TAB] key to jump between selectable elements on the screen, and the [ENTER] key to make selections. These keys are configurable to the specific device the viewer uses, so that even persons suffering from paralysis are able to navigate and make selections in the module. There is a great deal of information available on this topic, and I encourage you to do some internet searching to learn more.

There are some pitfalls to keep in mind when making sure that your module is JAWS compliant. For example, tables and charts can be a real nightmare. The JAWS reader will continue reading every entry and element, and the viewer will be unable to make any selection until every cell in the table is read. Drop-down menus were also problematic in Storyline 1, and I’m curious to find if any of these issues were improved in Storyline 2. In any case, be sure to carefully test your module for JAWS compliance using the keyboard instead of the mouse for navigation.

Accessibility keyboard key Finger

Interactive Activities

Some interactive activities are not suitable for keyboard navigation, and therefore are not JAWS compliant. For example, drag-and-drop activities are difficult if not impossible to navigate using only the keyboard. Whenever possible, modify the activities to using multiple selection, where the user can tab to the correct answer and select it with the [ENTER] key. To liven up your activities, you can always add some visual interest, such as animations. Be sure to describe any relevant visual content so that JAWS will read it to visually impaired persons.

Documentation

A final step to completion of your accessible eLearning module is creating an Accessible Word and PDF document. This document should be a textual description of the entire module, slide by slide, with effort to retain as much of the experience of the module as possible. Question slides should cite the question, possible answers, correct answer, as well as feedback for both correct and incorrect answers. Interactive slides should describe the activity, and likewise give correct responses including feedback.

Once the Word document is created, it must be checked for accessibility. This ensures it can be read by a screen reader. It should contain a proper Table of Contents as well as Headings, which will be converted to Chapter Bookmarks when exporting to PDF. Word has a feature to Inspect Document > Check Accessibility under the File menu, which will help you resolve any problems within the document. Finally, you can Save as Adobe PDF, also from the File menu. Under Options, ensure you have checked Enable Accessibility and Reflow with tagged Adobe PDF, and Create Bookmarks with Convert Word Headings to Bookmarks. This will make sure that your PDF is fully accessible.

Acrobat PDFMaker

You can make your Accessibility Document available as a hyperlink from within your module, so that users can download it and print it, or use it with their screen reader software. A good idea is to include it in your Resources menu.

If you would like to learn more about accessibility and eLearning, please visit our company website, Pathways Training and eLearning, at http://www.pathwaystrainingandelearning.ca/.

Creating Accessible eLearning Modules

Closed Captioning in Storyline 2

When developing an eLearning module, you will often need to provide closed captions (CC) that can be toggled on and off. There are several ways to do this, and I want to share a method with you which works the best for us as Pathways Training and eLearning.

Let’s first examine some other ways and their deficiencies. You could create closed captions by placing text boxes on tracks in the timeline, and timing their start and end to the audio. Although this method works, your stage will show all of these text boxes overlapping, and it will be difficult to edit them. You will have to toggle off the visibility of all other CC tracks to edit the one you’re working on, and that takes time. Further, if you forget to toggle some tracks on when you’re done, you will not see those lines on the slide. Therefore, using text boxes on track in the timeline to do closed captioning is not very efficient and can lead to errors. There are better ways to do it.

A method we used until recently involves creating a CC layer on the Slide Master, and a text box there with a variable to display the text. We use the variable name “CCtext” to store the current string for closed captions. To display it in the text box, you must type %CCtext% into it. Storyline will recognize anything enclosed in percentage signs as a variable. We used a separate variable, “CC” to toggle the layer on and off.

The advantage of this method is that you can change the value of CCtext at any time, on any slide. Simply place a cue point on the timeline, and create a trigger that will change CCtext to the appropriate string when you need to update the line. No need for overlapping text boxes and messy timelines with many tracks. All of the CC text can be updated in the Player Triggers section alone. Cue points on the timeline can easily be adjusted to time the close captions perfectly.

The disadvantage of this method is that if you want to toggle CC on and off from the player menu, you will need to use a bit of Javascript code. The code merely toggles the value of the Boolean “CC” variable. This doesn’t seem too complicated, but the problem is that in Storyline, Javascript will not evaluate during preview. That means you have to publish the module to see the functionality. This can really be inconvenient, as you have to “trust” the code to function properly.

However, there is another solution! Set up your CC layer as described above through the Slide Master. Then, create a blank slide in your module, disconnected from any other slide. Let’s name this slide “CC Toggle”. The slide will be empty and set the timeline to be zero – drag the “End” of the timeline back to zero. Create two triggers on this slide: (1) Toggle variable CC when timeline starts, and (2) Jump to previous slide when timeline ends.

Essentially, this slide will toggle the CC variable and then jump back to wherever it was called from. This is done without Javascript, and is flexible to use from any slide in the module – as long as said slide uses the CC SlideMaster that we set up earlier. Now you can preview your slides with CC toggling functionality.

The only drawback that we could find is that when you toggle CC with this method, the slide you are currently on will restart. This can be remedied if you set your slide options to resume saved state when revisiting, however, you likely don’t want to do that for most slides. Still, replaying the slide when toggling CCs is not necessarily a bad idea, and it’s unlikely to be intrusive as closed captions are not toggled frequently. Usually, the user would turn them on or off once or twice during the module, and in that case it’s acceptable to replay the current slide.

Until an integrated CC solution is available in Storyline, the solution presented here will allow you a flexible and pre-viewable option to implement closed captions. We hope you will find it useful.

To learn more about our company and how we contribute in the field of eLearning, please visit our website at http://pathwaysinc.ca/.

Closed Captioning in Storyline 2

Creating Animated Elements

Previously I wrote about why it’s beneficial to include animated elements in eLearning and training modules. This time I would like to delve deeper into the process of how this is done.

Even if you are a novice to 3D animation, spending a few hours on useful tutorials will get you up and running in your 3D software of choice. You will be able to create elegant, impressive assets to use in eLearning modules, websites or videos. You will be able to make animated buttons or icons with glow or light effects, or amazing, photographic reflections. All it takes is a little bit of effort and a few hours of learning how to use a 3D animation software. The rewards are endless possibilities of custom additions to your eLearning modules, websites and videos!

My choice of 3D software is Autodesk Maya, however you can just as well use 3D Studio Max, LightWave 3D, Houdini, or the free open source 3D animation software Blender. Depending on your tool of choice, the details of how you create and animate your 3D assets may differ but the general workflow remains the same. Today I will talk about how to create a spinning “QUIZ” token, as in the image sequence below:

Quiz_Rotation

In Maya, I created a sphere and squished it. I set the material of the sphere to “Glass, Solid”. I created two rings out of cylinders, and shaped them to conform to the surface of the sphere. I created some grooves in the rings for interest, and assigned a polished metal material to them. I created the word “QUIZ”, extruded it slightly and using the bend modifier, I wrapped it neatly onto the surface of the glass sphere. I assigned the same polished metal material to it. Finally, I copied the glass sphere and squished it even further, making it almost completely flat. I positioned it inside the glass sphere, and chose a green metallic paint material for it.

I grouped all of these objects together, so that I can rotate them as one object. I animated a slow rotation of 180 degrees over a period of 96 frames. (At 24 frames per second, this works out to be a 180 degree rotation in 4 seconds.) Finally, I added an HDRI reflection to the scene, which reflects beautifully on the glass surface. You can read about and download free HDRI reflection maps if you do a search online. Reflections really add the extra polish to your assets, making them look shiny and elegant.

I rendered the rotation in 96 frames as a sequence of images. I prefer to use the .PNG format, because it retains quality and allows my background to be transparent.

Next, I imported the sequence of images into Flash, where I distributed them to keyframes in the timeline. Flash can do this automatically for you. For specifics on how to do this, or any other procedure I described here, please do a search online. All the information is out there and accessible, if you only take the time to search.

If you want your animation to loop continuously, you are done! All you need to do is create the .SWF movie in Flash, and it will loop continuously. If you want the animation to only loop once (or twice, three times…) then you have to create a keyframe on a new layer, at the point where you want the animation to stop. On this keyframe, open the Actions window, and type the script:

stop();

This command will tell Flash to stop the playback at this point, and not loop the animation continuously. Now create the .SWF file – the shortcut on a PC is [CTRL]+[ENTER]. You are done! You have created an animated Flash movie from your image sequence, which you can now import into Articulate Storyline and use in your eLearning modules.

Depending on the format that you need, you can create a similar animation for use on a web page or for a video. You can easily change the text or colour of your animated element, you can add glow or change the lighting or materials. Try experimenting with different kinds of HDRI maps to see what effect different reflections have on the look and feel of your animation. There are many free HDRI maps on the internet, of both interior and outdoor scenes.

I hope this article inspired you to use 3D assets in your projects, and learn more about 3D animation software. For me, 3D animation has opened doors to creativity and I always love to incorporate it into my work.

If you would like to see more about how 3D and 2D animation, as well as whiteboard animation can be used to enhance eLearning, please visit our company website, Pathways Training and eLearning, at http://www.pathwaystrainingandelearning.ca/.

Creating Animated Elements

FLASH: A DYING PLATFORM

AN INTRODUCTION

Flash has been a mainstay on the internet for a long time, helping us view a lot of wanted and unwanted content. Its peak usage was in the early 2000’s as a lot of animated and video-based content on the web was based on it. The problem, however, was that there were (and still are) a lot of bugs. Adobe has been working diligently to patch any issues that arise, but recently these have come to a head.

A STEADY DOWNFALL

The first platform to be at odds with Flash was mobile. There was a divide in the early days of iOS and Android where support was completely phased out of iOS but survived on Android for a while longer. In 2010, Apple outlined their concerns on flash which were that the energy consumption was rapid, performance was poor, the security was abysmal, it lacked touch support, and they wanted to avoid a third party layer of software between the platform and developers.

Later on in 2012, we saw Flash support on mobile take another major hit when Android announced the end of support for the Flash Player. The formerly available app on the Play Store was removed, and support for any future versions had officially ended. Any devices running android 4.1 or later would not have access to the player leaving users on their own to manage any issues.

All of this has culminated in today’s issues with the desktop version and a major flaw in the Flash Player. Just under 11% of websites are using Flash according to a CNN article detailing how Firefox is now blocking the add-on. As well, Chrome is going to block Flash content beginning September 1st, which is a major blow.

HOW IT AFFECTS LEARNING

This affects learning such that a lot of modules and learning software packages rely on Flash as a platform. Whether the modules were written directly in Flash with an xml layout our content, or exported from any existing version of Storyline, you’re still dealing with an SWF (ShockWave Flash) output. The impact in the short-term will probably not be felt, especially since some corporations are running on legacy software in the first place.

However, when it comes to gamification, the focus will probably shift from Flash development to game engines such as Construct 2 which offer similar functionality that caters more to mobile users. The trend may also display more of a sway to native mobile apps as we make a push for more portable learning. While Flash’s mobile support has been dead for some time, it had a small resurgence with HTML5 embedding. This, however, is bringing back all of the issues outlined by Apple in their article titled Thoughts on Flash.

WRAPPING UP

Flash has gone from a mainstay on the web, to more of an addon that people tend to pass by. It’s a developing story, and will surely have some interesting twists.

If you would like to explore more about gamification, mobile learning and eLearning, take a peek at our company website: Pathways Training and eLearning, at http://www.pathwaystrainingandelearning.com/ . We always look for fresh ways to engage learners and to make the learning experience as fun as possible!


Sources:

http://money.cnn.com/2015/07/14/technology/flash-firefox-facebook/

http://www.digitaltrends.com/android/adobe-flash-for-android-gone-with-barely-a-whimper/

https://en.wikipedia.org/wiki/Adobe_Flash

https://en.wikipedia.org/wiki/Apple_and_Adobe_Flash_controversy

http://arstechnica.com/information-technology/2015/08/google-chrome-will-block-auto-playing-flash-ads-from-september-1/

http://www.apple.com/hotnews/thoughts-on-flash/

FLASH: A DYING PLATFORM

Game On! The Gamification of Learning and Why Few Companies Are Doing It Right

Gamification is a hot new buzz word in corporate training departments. Despite this hot new trend, few companies are actually applying gamification to learning.

So what is gamification? According to Kevin Werbach from Penn University, the definition of gamification is the application of game elements and digital game design techniques to non-game problems such as business impact and social challenges.*

According to recent studies, learners retain more information when gaming is used. In fact, knowledge retention is 17% higher when educational games are used in comparison to traditional lecture based training courses.  Recent studies have also looked at the knowledge retention rates of education games versus group discussions, and gamification is still the better approach with leaners having a 5% higher knowledge retention rate when games are used. **

Why is gamification so successful at helping learner retain information? Learners are fully engaged at all times in a game, while this not always the case with other delivery methods.

So why aren’t more companies and corporate training departments using games?  The reasons why are simple!

  • Most of us don’t know how to develop a learning experience where traditional storyboards are not used. – Most of us know how to develop eLearning modules and curriculums for a classroom environment but what about for a true game, where actions happen on every screen and they change every second based on the actions learner’s take? This type of interactivity can’t be scripted out in traditional storyboards, leaving many people unsure of what the instructional design process is for gamification.
  • ELearning programmers are very familiar with how to use authoring tools like Storyline, Captivate or Lectora but gaming engines are something new. – Many programmers use authoring tools with templates to develop eLearning.  Using a gaming engine or something other then an eLearning authoring tool is something that many programmers have never considered and quite frankly, many programmers might not be willing (and in some cases might not have the skills) to use.
  • Change is scary – Change is hard work and the fear of failure by trying something new, is scary for most people. It is far easier for instructional designers to stick with storyboarding traditional eLearning modules, than to try something new, like gamification that requires more time and new skills.

So what do you do to create highly engaging learning games and how can you get beyond these three barriers?

We have recently developed some highly interactive mobile learning games for some of our Fortune 500 clients (think Candy Crush or Angry Birds) and in my next blog post I will share the process we used to get beyond the traditional storyboard approach and to create truly engaging and interactive learning games for any audience.


* Kevin Werbach. “(Re)Defining Gamification” Springer Lecture Notes in Computer Science 8462 (2014).

** Sitzman, T. (2011)  A meta-analytic examination of the instructional effectiveness of computer-based simulation games. Personnel Psychology. Review of 65 studies. Chapter 4 “The Gamification of Learning and Instruction.”

For many, gamification means a fun test for understanding like a Jeopardy game at the end of an eLearning module to test what the learner knows, but this is not true gamification.

Game On! The Gamification of Learning and Why Few Companies Are Doing It Right

MLEARNING AND GAME CREATION

In earlier articles, I emphasize the subject of gamification and the importance of making learning fun. Today, it’s time to take a look at the process of developing an actual mLearning game, from the idea to execution.

Fantasy Island

The Game Plan
To realize your idea of making a game, you must have a plan – a clear vision of how to get from start to finish. For my game plan, I decided to break the process down into four stages:

  1. Proposal/Game Design
  2. Alpha/Game Functionality
  3. Beta/Game Polish
  4. Delivery/Distribution

The Proposal
If you are working for a client, your project must first be approved before you can count on funding it. The proposal is a game idea pitch, an opportunity for you to share your concept of the game with the clients and discuss any modifications to the look or function. Often, we present three ideas for games to a client, and let them select one.

Game Design Document and Storyboards
Once the game is selected, it must be documented in a Game Design Document. This is the game Bible, the script detailing every aspect of the game. It is the vehicle of communication for all team members working on the game.

There are free templates for game design documents on the internet. Some of the contents are specific to a particular game type, while others are more general. Some items that should be found in a game design document include:

  • A game overview, answering questions like what is the game about, what do you control, what is the style of the game, and what is the objective/winning condition.
  • A list of all screens, detailing all functions that can be performed on each screen.
  • Description of features and game play.
  • If appropriate, world layout, game characters, storyline.
  • Guideline to UI (User Interface), art direction, sound/music direction.
  • Appendices to character sketches, scenery/set design, monsters/villains, vehicles, architecture and objects found in the game.

Based on the Game Design Document, the next step is to create Storyboards for every screen in the game, providing a concrete visual guide to the 2D and 3D artists working on the game.

The Alpha Stage
During the Alpha stage, the focus is on game functionality. The appropriate IDE / programming language / development kit must be selected to code the game, depending on game type and target platform. If the game uses a 3D engine, the appropriate engine must be chosen.

The goal of the Alpha stage is to create a functional game, albeit some of the graphics and sound are not polished yet, and some of the functionality may need to be refined. However, all-in-all, by the end of the Alpha stage, the game should be playable. The deliverable at the end of the Alpha stage is a straw-man version of the game, which means the skeleton/back bone is there but still needs to be fleshed out.

At the end of the Alpha stage follows a period of Alpha testing and debugging. The Alpha testing can be done internally (by the people working on the game), and reporting should be coordinated by someone who will sort the bug reports by priority and eliminate duplicate reports.

On to Beta
During the Beta phase, the focus is on polishing the game. This is the time to focus on graphics, animation, sound and music, and really dazzle and jazz it up. The programming team must also work out all the problems encountered during Alpha testing.

It is not enough for the game to be playable. The game should be beautiful! For example, when the player gets points for some action, the points should not just appear. They should pop up with some visual and sound effect. The controls should be refined – when the character comes to a stop, there should be a slow-down or deceleration. The character should not go from a full run to a full stop with no transition.

There are more things to polish in a game than I can describe. If you are a careful observer, try to pay attention to all the little special effects and animations that occur when you’re playing a well-designed game. Often, you won’t even notice the little fading effects, or the movement of animated backgrounds, the mouse-over effects of buttons, and all the little intricacies that go into making a game polished.

The famous Beta Test
Beta testing is famous because this is usually the first chance the community has the opportunity to try out the game. By this point, the game should be polished. The reason to open the test up to people other than those working on the game is to get input from the experience of a user who has never played the game before. Is the game too hard? Too easy? Is it boring? Is it well balanced?

Beta testers should be encouraged to find every possible way to “break the game”, or any game mechanics. Again, reporting should be coordinated by someone who will prioritize the bugs and eliminate duplicate reports. After Beta testing and fixing of the problems found, the game is essentially ready for the market.

Delivery and Distribution
Often, the delivery requires multiple platforms (PC, Android, iOS, etc.) and porting the code must be taken care of. Other requirements may be translating the game into multiple languages. These considerations should be known from the onset, and appropriate planning put in place so that the porting and translations will occur smoothly.

Bringing eLearning into Gaming
The process I described above applies to creating any sort of game. At my company, we focus on creating games with an eLearning element. Sometimes it can be as simple as asking a multiple choice question at certain points during the game. Other times, the eLearning is much more integrated into the storyline and character advancement.

If you would like to explore more about gamification and eLearning, take a peek at our company website: Pathways Training and eLearning, at http://www.pathwaystrainingandelearning.ca/ . We always look for fresh ways to engage the learner and to make the experience as fun as possible!

MLEARNING AND GAME CREATION

Good Infographic Design

Charts, graphs and diagrams are all very basic forms of data visualization, but infographics takes your data to the next level.

Infographics are a great tool for conveying data and can help your audience quickly understand the information and how the facts correlate. What separates the really good infographics from the rest?

Before creating an infographic, it’s important to determine what message you want to convey. Telling a clear story draws your audience in and creates an emotional connection along with delivering information. Find the story you want to tell with graphics, and choose your data and facts carefully to support that idea. Consider three main points you want readers to remember when they’re done reading.

The design of an infographic involves visually presenting the data and story in a beautiful and appealing way. A good infographic requires the right color scheme, readable fonts, graphics, icons, characters and finding clever ways to illustrate information.  Done right, your graphics should simplify the data and make it more digestible.

However, there are several issues that you should keep in mind when making an infographic. How much text is there in your document? If there is more text than images, an infographic may not be the best option to present your information. Simplify and condense the text you need to keep your message clear. On the other hand, if the data you’re showing is already simple and straightforward, the graphics may not be adding anything of value to the reader.

Make sure you gather data from reputable, current sources and list your citations at the bottom of the graphic. If the validity of the data is in question, it will undermine the credibility of the site it is on.

If you are designing the infographic for a website, make it easy to share and generate traffic to boost page rankings. Make sure the infographic can be easily read on a computer screen, and optimize the infographic with keywords in the title and alt text. Add sharing buttons to encourage readers to promote your graphic.

Good Infographic Design